The first shower after a knee replacement is its own little mountain. When Gene came home from his surgery two years ago, we had a stack of discharge instructions as long as my arm, and somehow the bathroom was not on any of them. Standing on one leg on a wet floor, holding a soap bottle in one hand and the wall in the other, is not a plan. It is how people fall. I knew we needed a better plan before he ever tried it, and I knew it had to be a plan he could manage on his own.
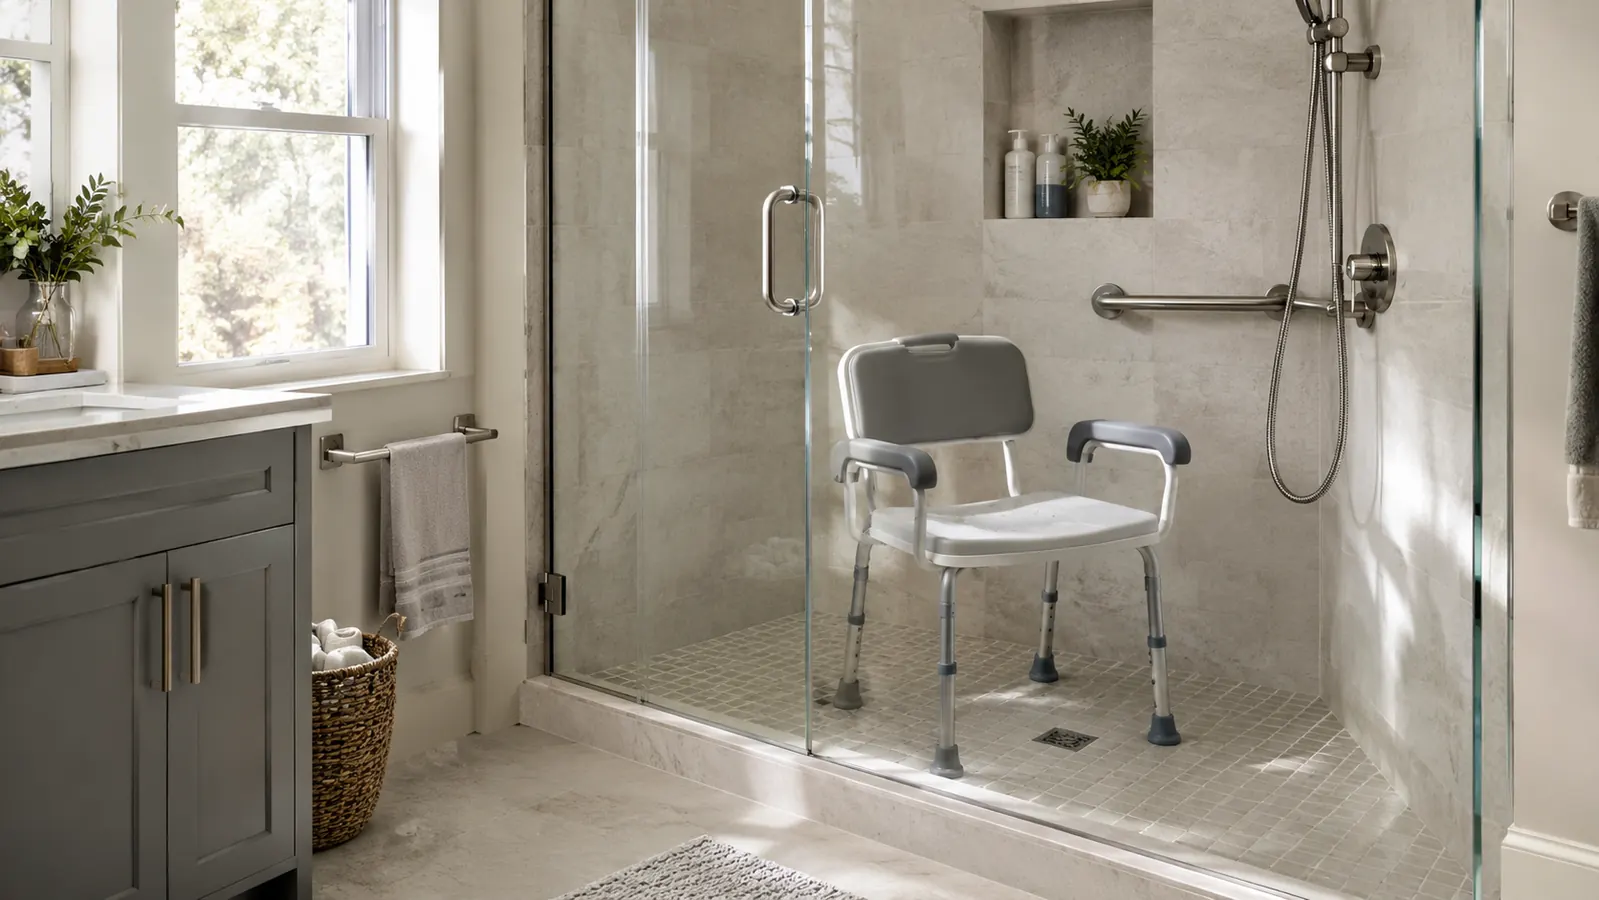
That is why we bought the Medline Shower Chair Seat with Padded Armrests and Back before his first attempt at a shower. A chair that sits inside the tub sounds too simple to matter, but it changed every part of the routine. It gave Gene a place to sit, a place to rest his operated leg, and two padded armrests to push against when he stood up. I am not a doctor or a physical therapist, and nothing I say here replaces their advice. This is just what worked in our house, and what I would tell a neighbour going through the same thing.
A stable seat for the scariest part of recovery
The Medline Shower Chair gives you a slip-resistant seat with padded armrests, a back, and adjustable height, built for up to 350 lb. We had it in our tub in about ten minutes. Check today's price on Amazon.
Amazon Check Today's Price on Amazon →The Routine That Worked for Us
Gene's physical therapist gave us one rule that shaped everything: plan the bathroom before you need it. So that is what these five steps are about. Each one is something we did, in order, and each one made the next step easier. Your own bathroom and your own surgeon's instructions may change the details, but the order is the part I would keep.
Step 1: Set Up the Bathroom Before Surgery Day
Move everything you need within arm's reach of the chair before you are recovering from anything. We cleared the floor of rugs, moved the hamper out of the doorway, and put the soap, shampoo, and a towel on a low stool next to the tub. The goal is to shower without bending, twisting, or reaching for anything, because every one of those motions is harder with a fresh knee.
We put the Medline chair in the tub-shower combo bathroom. If you only have one shower, put the chair there and bring in a handheld shower head or a plastic pitcher. Gene used a pitcher for the first week, and it worked better than I expected. You do not need a fancy setup to make a shower safe.
Also test the chair before surgery day. Sit on it fully dressed, adjust the height, and have someone watch you get up and down a few times. It is much easier to learn a new routine when your knee is not the thing you are thinking about. We did one practice run the night before Gene's surgery, and that rehearsal made the real first shower feel familiar instead of frightening.
Step 2: Set the Chair Height So Your Feet Sit Flat
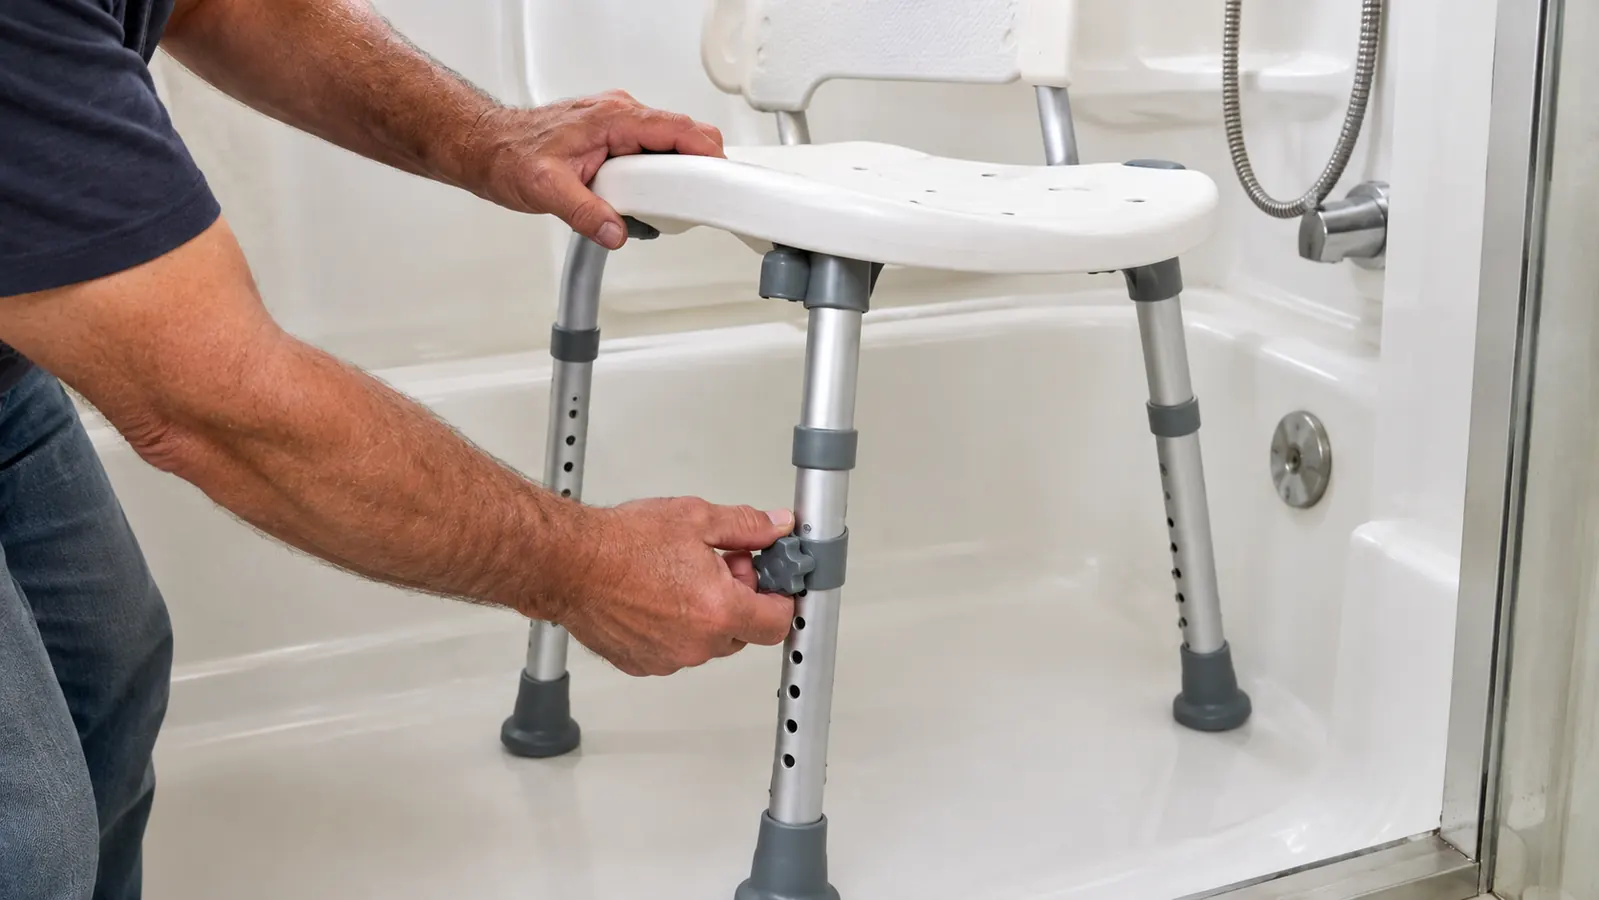
The height adjustment on the Medline chair is the feature I would not trade. Each leg clicks to a different height, and the right setting is the one where Gene's feet sat flat on the tub floor and his knees stayed below his hips. That angle kept his operated knee from bending too far, which was the exact instruction his surgeon had written on the discharge sheet.
Your surgeon will tell you how much bend is allowed, and that number matters more than anything I can say. For Gene it was about 90 degrees, and we set the chair so his knee never went past that. If the chair is too high, your feet dangle and you lose the stable base you need to stand up. Too low, and standing up takes too much work from the leg you are trying to protect.
Test the height with the chair empty first, then with a person sitting on it. The seat compresses a little under weight, so what feels right standing next to the chair can feel wrong once you sit. We adjusted twice before we got it right, and it took about a minute each time. That adjustability is the reason the chair works for more than one person in the house.
Step 3: Sit Down and Stand Up With the Armrests
This is the heart of the whole routine. To sit, Gene backed up until the back of his legs touched the front edge of the chair, reached behind for the armrests, and lowered himself slowly, keeping his operated leg out in front of him. The padded armrests gave him something to hold that did not dig into his hands, even when he was putting real weight on them.
To stand, he did the reverse in slow motion: slide forward until his feet were flat, press down on both armrests, and let his good leg do most of the work. The armrests are the reason he could do this without grabbing the shower curtain rod, which is the one thing I told him never to touch. A curtain rod will not hold a person's weight, and testing it is not worth the risk.
The first few times, I stood in the doorway with a towel in my hands, ready to help. By the second week, Gene did not need me there, and he told me the chair made him feel steadier than the walker did. That independence was the whole point of the chair, and it is the reason I would buy it again.
Step 4: Shower in Sections and Let the Water Do the Work
Once Gene was seated, the shower became a series of small jobs instead of one big balancing act. He washed his upper body first, then his good leg, then his operated leg last and with the lightest touch. A handheld sprayer, or a plain plastic pitcher, meant he never had to twist to rinse his back, and the chair meant he never had to stand to reach anything.
We kept a bottle of body wash and a long-handled sponge on the stool next to the tub so he did not have to reach down. Soap on the floor of a tub is a hazard even for people with two good knees, so everything slippery stayed up high or in his hand. A soap dish that hangs over the tub rail worked well for us.
The water temperature was another small thing that mattered. Heat can make you feel lightheaded, and lightheaded plus a wet floor is a bad combination. Keep the water warm rather than hot, and if you feel dizzy at all, sit still, turn the water off, and call for help. There is no shame in taking a slow shower, and there is no prize for finishing fast.
Step 5: Dry Off While Seated, Then Stand Up Slowly
Drying off while seated was Gene's idea, and it was a good one. He patted himself dry with a towel that hung over the side of the tub, so he was fully dry before he stood up. That meant no standing on wet skin, which is exactly the kind of small risk you do not need after surgery. A dry body on a dry seat is a much easier thing to stand up from.
Then came the slow stand: feet flat, both hands on the armrests, good leg doing the work, operated leg barely touching the floor. He stood, steadied himself on the wall for a few seconds, and stepped out onto the non-slip mat we had put on the floor outside the tub. We bought that mat the same week we bought the chair, and I would call it the second best purchase we made.
We also kept a second towel and a robe on a hook right next to the shower. Being able to reach everything without walking across the bathroom in bare wet feet is a bigger deal than it sounds. It is the difference between a calm exit and a hurried one, and calm is the whole goal after surgery.
What Else Helps
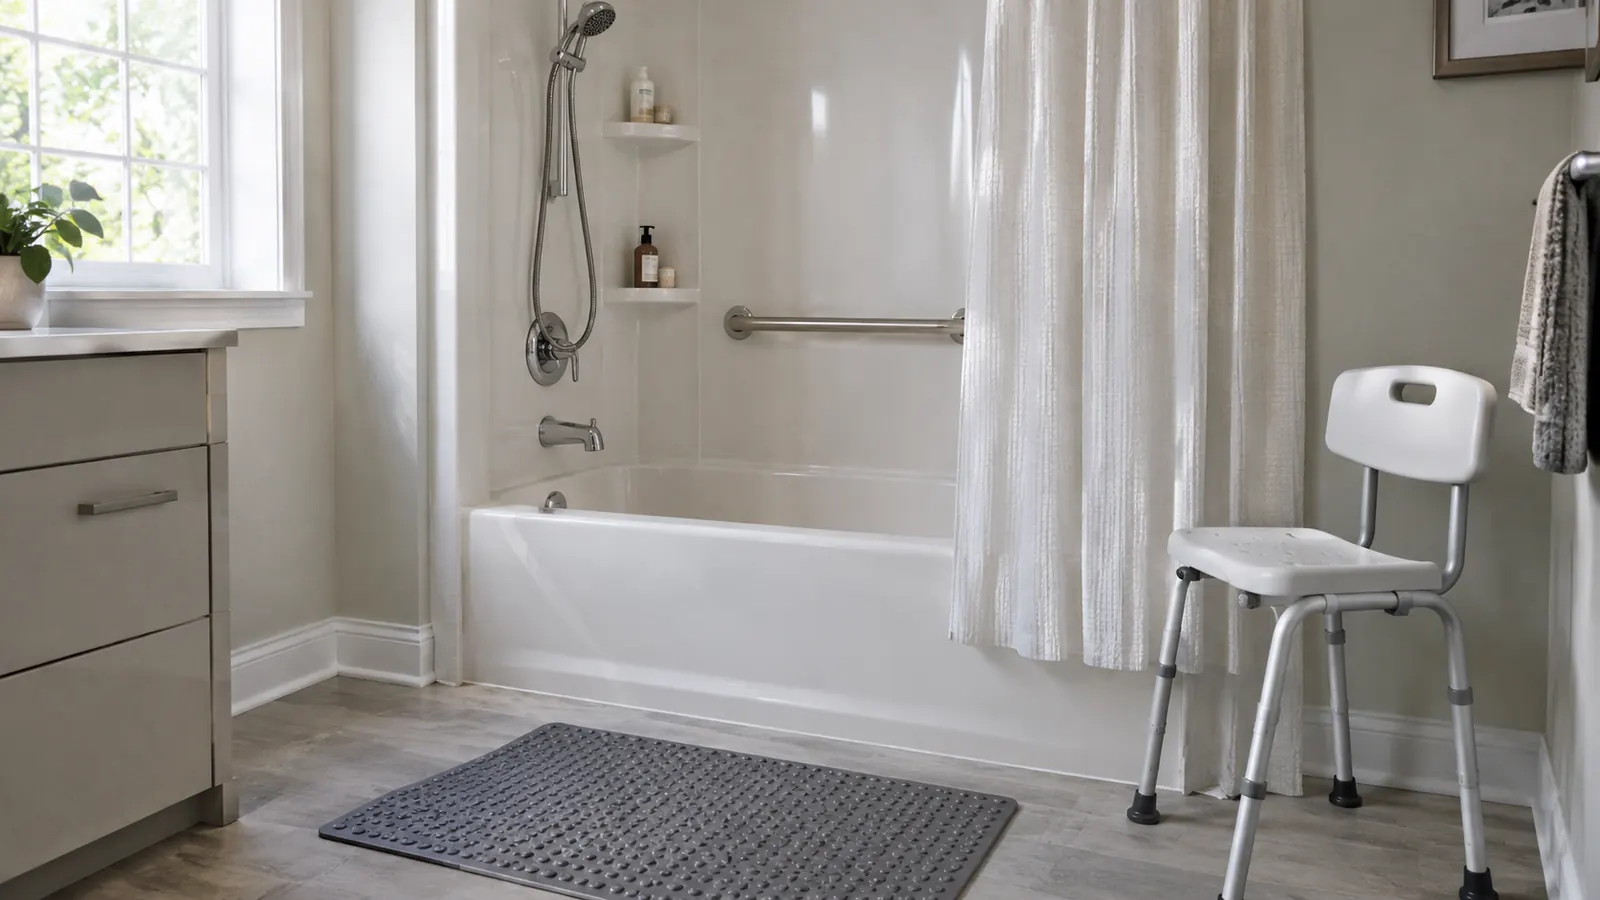
A shower chair does most of the work, but a few small things made the routine much easier. A non-slip mat outside the tub, a handheld sprayer, and a stool for soap and towels all take a few minutes to set up, and each one removes a risk. We also kept a phone charger and a bell on the bathroom counter, not because Gene needed them often, but because knowing he could call me made both of us calmer.
And one thing to skip: bath towels on the floor as a makeshift mat. They slide. A real non-slip mat with a rubber backing stays put, and that is what we used for the whole recovery. If you are not sure what your bathroom needs, ask your physical therapist. They have seen a hundred bathrooms and they will tell you exactly what to fix.
Why a Chair Instead of a Stool or Bench
We looked at a few options before we settled on the Medline chair. A plastic stool is lighter and easier to move, but it has no back and no armrests, which means you are still doing a lot of work with your legs. A transfer bench spans the tub wall, which is useful if you cannot step over the side, but it is a bigger piece of equipment and it does not fit every bathroom.
The chair with the back and padded armrests worked for us because it gives you somewhere to rest and something to push against. The back matters more than I expected. On the days Gene felt tired, he could lean back and take a breath instead of hovering over a stool, and that little bit of rest made the rest of the shower easier.
A Note About the First Week
The first week is the hardest, and not because of the shower. Gene was tired, the pain medicine made him sleepy, and his balance was not what it had been. We kept the first few showers short, about five minutes, and I stayed close by. Short and steady beats long and wobbly, and there is no rule that says a shower has to be a long one.
We also learned to leave the chair in the tub between showers. It is tempting to lift it out to make the bathroom look normal again, but lifting it is exactly the kind of bending and carrying you should not be doing. The chair lived in the tub for six weeks, and the house did not fall apart because of it.
The armrests are the reason Gene could stand up without grabbing the shower curtain rod, and the reason he showered on his own schedule by week two.
If you are reading this the week before your surgery, do the setup now, while you can still bend and reach. If you are reading it the day after, that is fine too. The chair goes in the tub, you sit down, and you take the shower one small step at a time. Check with your doctor or physical therapist before you change anything about your routine, and take the rest of this as one neighbour telling another what worked in her house.
Give yourself a stable place to sit and a hand to push against
The Medline Shower Chair Seat with Padded Armrests and Back is adjustable, slip-resistant, and rated for up to 350 lb. It made recovery easier in our house, and it can do the same in yours. Check today's price on Amazon.
Amazon Check Today's Price on Amazon →