
The first time my hip let me know it was done being ignored, I was halfway up the three steps to our front porch. I stopped, held the railing with both hands, and waited for the ache to pass. It did not pass, not really. It just moved around. That afternoon I called my doctor, and she said what I already knew: a cane could take some weight off that hip while I figured out what was going on. She also said the same thing I am going to say to you now, so let me get it out of the way. I am not a doctor or a physical therapist. If your hip hurts, please check with yours before you change the way you move. What follows is what worked for me, in my own house, with my own hip.
I bought a HONEYBULL walking cane because it folds in half and stands up on its own, two things I did not know I needed until I tried to lean a regular cane against a chair and watched it fall over. Gene, my husband, used the same cane after his knee replacement two years ago, so I already knew it could take real weight. What I did not know, until I spent a few weeks using it wrong, is that a cane only helps if you use it correctly. Most of what people think they know about canes is backwards. This is the order I wish someone had walked me through.
A cane that folds, stands on its own, and takes real weight
The HONEYBULL walking cane is the one I keep by the front door and the one Gene used after his surgery. It folds small enough for the car and stands on its own, so it never ends up on the floor.
Amazon Check Today's Price on Amazon →Step 1: Set the Height Before You Take a Single Step
This is the step almost everyone skips, and it is the one that makes every other step work. A cane that is too tall throws your shoulder up. A cane that is too short makes you hunch and puts the weight right back on the sore hip. Either way, you are not really using the cane. You are just carrying it.
Here is how to set it. Put on the shoes you will wear most days. Stand up straight, let your arm hang naturally at your side, and find the crease in your wrist. The top of the cane handle should sit right at that crease. When you grip it, your elbow should be bent at about 15 to 20 degrees, not locked straight and not bent like you are holding a tray.
The HONEYBULL cane has push-button adjustments, so you can change the height in seconds without tools. Gene is three inches taller than me, and we share the same cane by moving the button and sliding the shaft. Do not guess at this. Measure it once, in front of a mirror, and write the number on a piece of tape if you need to. Ten seconds with the button is worth more than a week of walking with a cane that is the wrong height.
Step 2: Hold the Cane on the Side of Your Good Leg
This is the part that feels wrong until you understand it. You do not hold the cane on the side that hurts. You hold it on the side of your good leg, so it steps forward at the same time as your sore hip. Your good leg and the cane take the weight together, and your sore hip gets to take a shorter, easier step.
I spent my first week holding it on the right because my right hip was the one complaining. Every step felt like a seesaw. Gene watched me from the kitchen doorway for about two minutes, then said, "other hand, Lorraine." I switched, and the difference was immediate. The cane stopped being a prop and started being a leg.
If it helps, think of it as the opposite hand, opposite foot rule. The cane moves with the leg that hurts, which means it is held in the hand on the side that does not hurt. Your arm and your good leg become a team, and that team carries the weight. Say it to yourself the way I did: cane with the sore side, hand on the good side.
Step 3: Walk Heel to Toe and Let the Cane Land With Your Sore Leg
Once the cane is in the right hand, the walking part is simpler than people make it. Take a normal step with your good leg. As that leg lands, step forward with the cane and your sore leg together. The cane hits the ground at the same moment your sore foot does, and it takes a share of the weight for that split second.
Land heel first, roll through the middle of your foot, push off from the toe. That sounds like a lot to remember, but it is just the way you already walk. The cane does not change your stride. It changes how much of your weight lands on the sore hip. Keep your eyes up, not on your feet. Looking down pulls your shoulders forward and puts more pressure on the hand gripping the cane.
Take shorter steps than you think you need, especially in the first week. A shorter step is a steadier step. I walk the neighborhood most afternoons, and on the days my hip is loud, I shorten my stride and let the cane do more of the work. There is no prize for walking fast. Practice in the kitchen first, where the laminate is flat and there is nothing to trip on, before you take it out to the sidewalk.
Step 4: Stairs and the Three Steps Up to the Porch
Stairs are where a cane earns its keep, and also where people get hurt. The rule is simple: up with the good leg first, down with the bad leg first. Going up, your good leg does the climbing and the cane and sore leg follow. Going down, the cane and sore leg go first, because the sore leg is the one that needs to be caught if it slips.
We have three steps up to our front porch, and they were the first thing I practiced. I held the railing with one hand and the cane in the other, and I said the rule out loud like a song: good leg up, good leg up, good leg up. Down is the one that takes courage. Bad leg down, cane with it, then the good leg joins. If you are holding a railing, keep the cane in the hand on your good side and let the rail do its own job.
If you have a handrail, use it. A rail and a cane are not the same job. The rail is the steady anchor and the cane is the weight bearer, and you want both. If your steps do not have a rail, this is the moment to call a handyman or a handy relative. That is not a small thing. That is the difference between going outside and staying in.
Step 5: Get Up From Chairs and Out of the Tub-Shower Combo Without Grabbing Air
The hardest part of using a cane is not walking. It is the getting up and sitting down at the start and end of every walk. Here is the version that works for me. Slide to the front edge of the chair. Put both feet flat on the floor. Push up with your arms from the armrests or the seat, and only reach for the cane once you are standing and steady.
The free-standing part of the HONEYBULL matters most here. A regular cane leans against the chair and falls over exactly when you need it. This one stands on its own, so I can leave it upright by the armchair, push up with both hands, and pick up the cane after I am stable. That sounds like a small thing until you have bent over to rescue a fallen cane with a sore hip.
Our bathroom has one tub-shower combo, and this is the place to be extra careful. I keep a bath mat with a rubber backing on the floor and I never, ever reach for the cane while I am still in the tub. I dry off, sit on the edge of the tub, then stand with one hand on the wall and one hand on the cane. Gene had a walk-in shower put in when he had his knee done, and if you are planning any bathroom work, that is the upgrade worth asking about.
What Else Helps
A cane is one tool in a bigger kit. The things that helped me most were the boring ones. Chair yoga for twenty minutes most mornings keeps my knees and hip moving through their full range. Walking the neighborhood most afternoons, even when the walk is short, keeps the muscles around the joint from getting tight. Good shoes with a firm sole and a low heel make every step steadier.
Also, look at your floors. We have carpet in the bedrooms and laminate in the kitchen, and the laminate is the easier surface to walk on. The carpeted hallway is where I slow down, because a cane tip can catch on the edge of a rug. If you have throw rugs, tape them down or take them up. That is the cheapest improvement you can make, and it is the one that prevents the most falls.
The height was the whole problem. Once Gene set the cane to his wrist crease, the limp he had carried for weeks was gone by the end of the day.
The Folding Part Matters More Than You Think
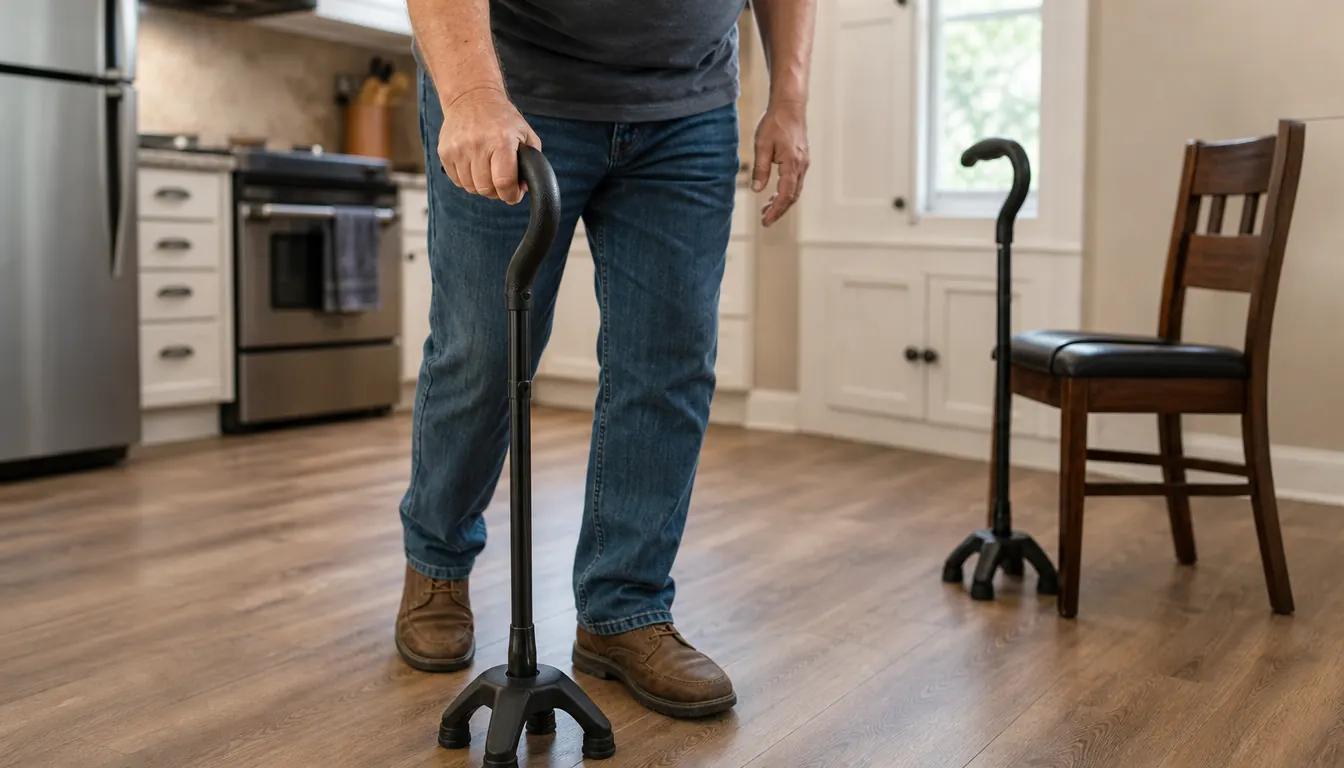
The reason I chose a folding cane is the car. Our mid-size sedan has a trunk, and a full-length cane does not fit across it without poking out at an angle. The HONEYBULL folds in half, so it rides flat in the trunk or behind the front seat, and it comes out in one piece when I need it. That matters more than it sounds. A cane you can take with you is a cane you will actually use.
It also stands on its own, which I have already mentioned twice and will mention again because it is the feature I did not expect to care about. You set it down and it stays where you put it. In a house with carpet in the bedrooms and laminate in the kitchen, that means I can set it by the bed at night, set it by the armchair in the living room, and never bend down to pick it up off the floor. Bending is exactly what my hip does not need.
When to Ask Your Doctor or Physical Therapist
Here is the honest part. A cane helps with weight and balance, but it does not fix the reason your hip hurts. If the pain is new, if it is getting worse, or if you feel like you are about to fall even with the cane, that is a conversation for your doctor or physical therapist, not for me. They can look at your actual hip and tell you whether a cane is enough or whether you need something more, like a walker or a plan for strengthening the muscles around the joint.
One more thing. A cane should take the edge off, not add a new ache. If your wrist, shoulder, or the hand gripping the handle starts hurting after a week, have someone check your height setting again. Nine times out of ten, the cane is too tall or too short, and the fix takes ten seconds. If the ache does not go away, that is another reason to talk to your physical therapist.
Start with the height, then let the cane do its share
The HONEYBULL walking cane folds for the car, stands on its own by the chair, and adjusts in seconds. That is the one I keep by the front door, and the one I would buy again.
Amazon Check Today's Price on Amazon →